To go to the client area settings, click on your email in the upper right corner and select the Settings section. You can also navigate to this block from the Client section.
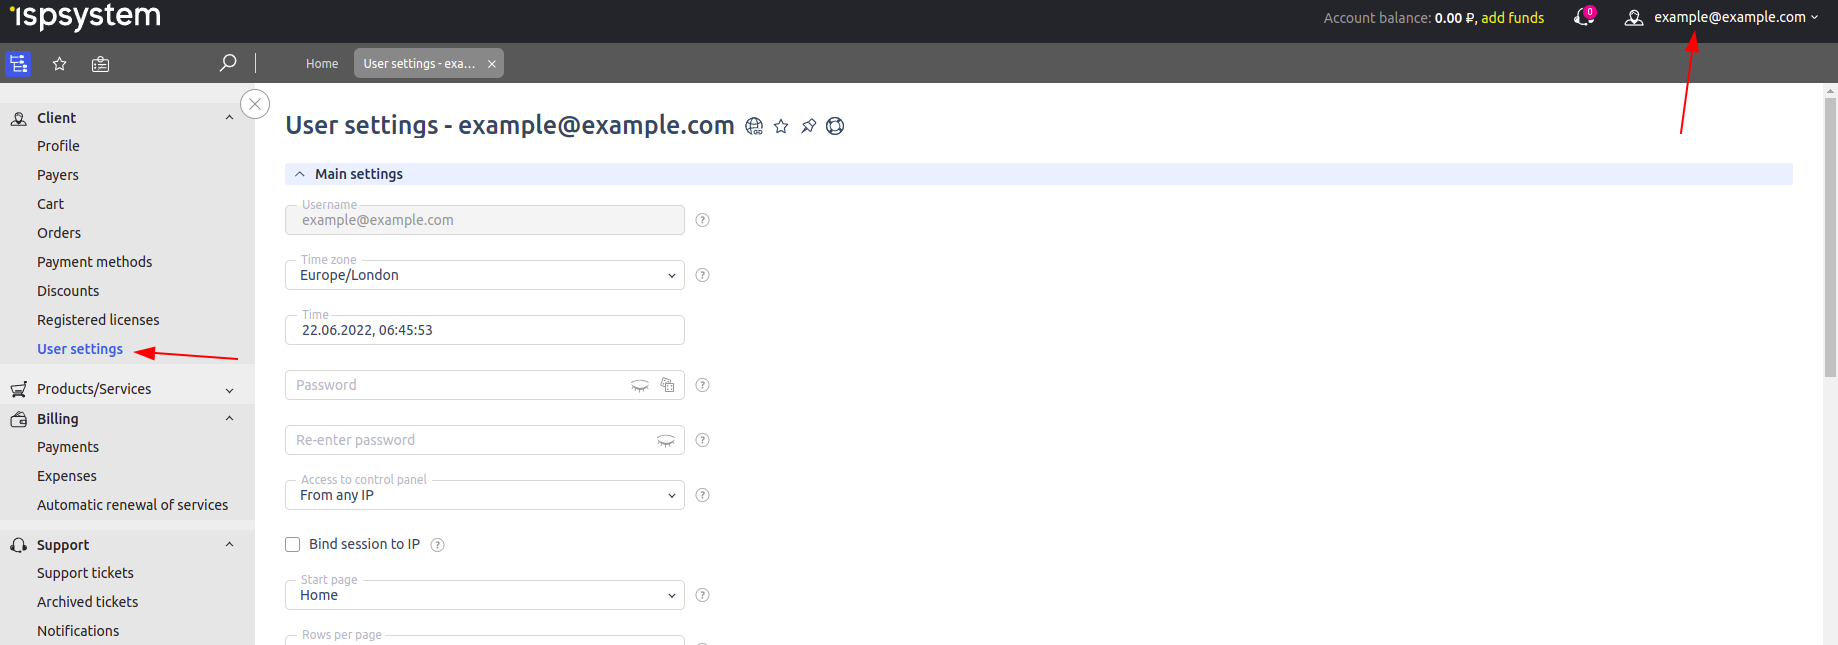
Profile settings
In this section you can set the time zone, link the session to an IP address, customize the appearance of the buttons, tooltips and more.
Profile settings
To edit the profile settings, enter Client → Profile. In this section, you can edit your phone number, or set a new password. We recommend that you provide a current phone number so that technical support staff can contact you quickly if necessary.
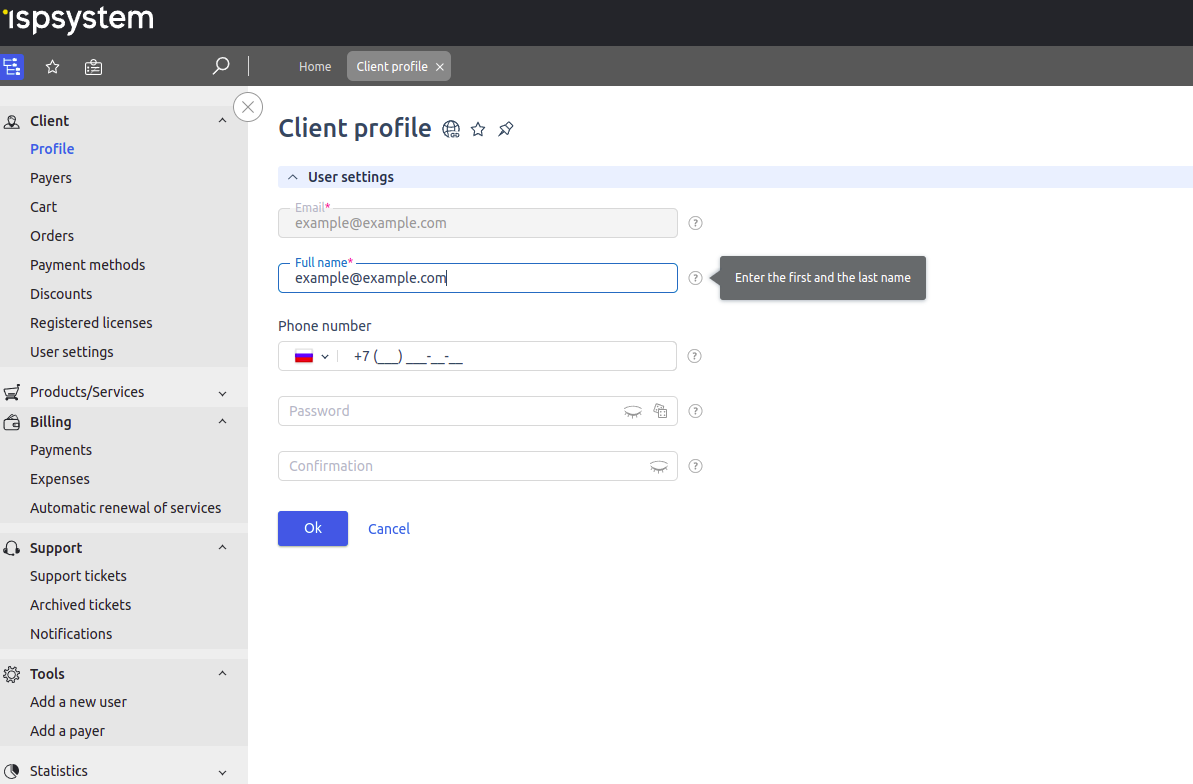
Personal settings
User settings
In the User settings block, you can change your password and set up trusted IP addresses or subnets. This will restrict access to your account. You can also enable region tracking by IP and authorization notifications.
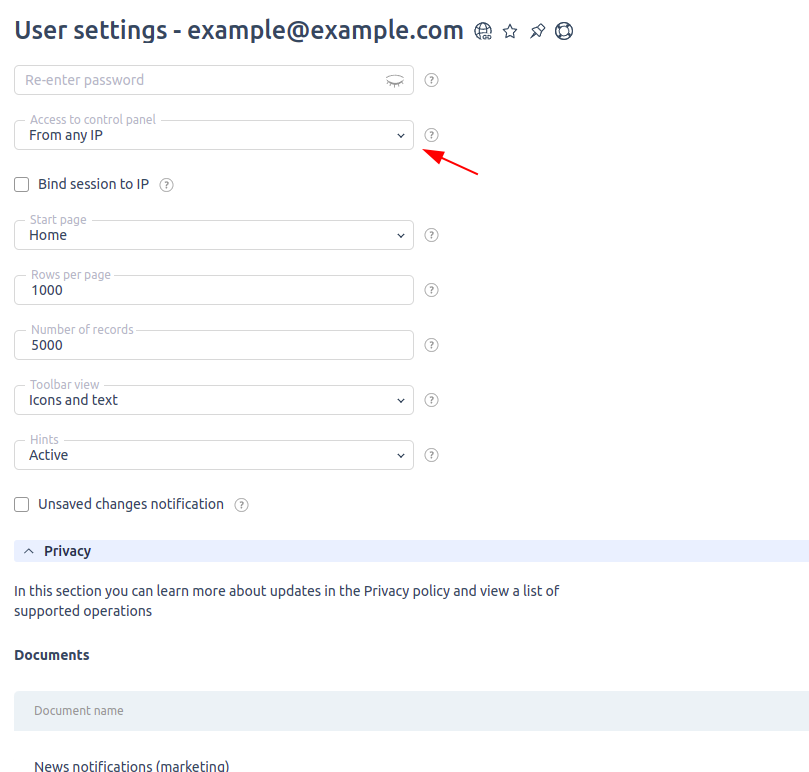
Password and access
You can also link a session to a specific IP. By enabling this option, you allow the session to be used only from the address the user had when the session was established.
For your convenience, in the User settings block you can individually set the start page, the size of the buttons, and the number of lines on the page.
Notifications
Replies from technical support, service status messages, accounting statements and invoices, and newsletters will be sent to the email address you entered. You can manage your subscriptions in the Subscribe to notifications section.
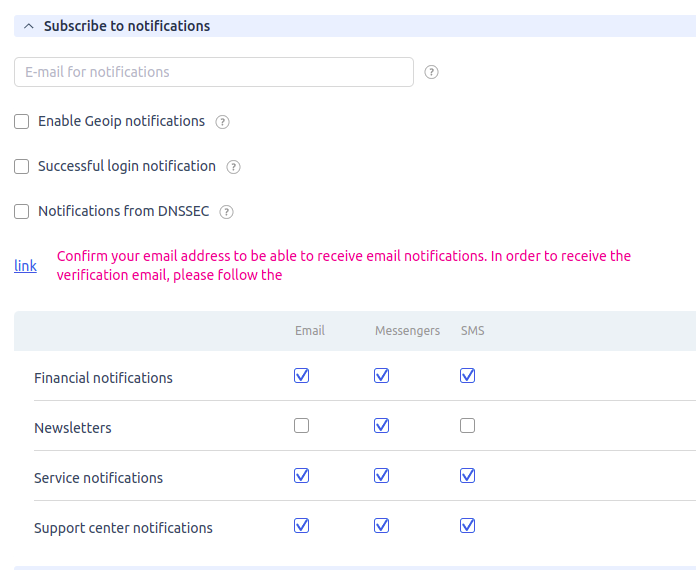
Notifications setup
All the notifications you receive to your email are duplicated in your client area You can view the email at any time directly in the client area interface. In addition, these notifications are also available to all connected trusted users.
In this section, you can also enable/disable certain notifications.
Privacy
In the Privacy section, you can:
- read the user agreement, privacy policy updates, and news;
- export your personal data, request deletion or restrict the use of your personal data;
- view the history of actions.
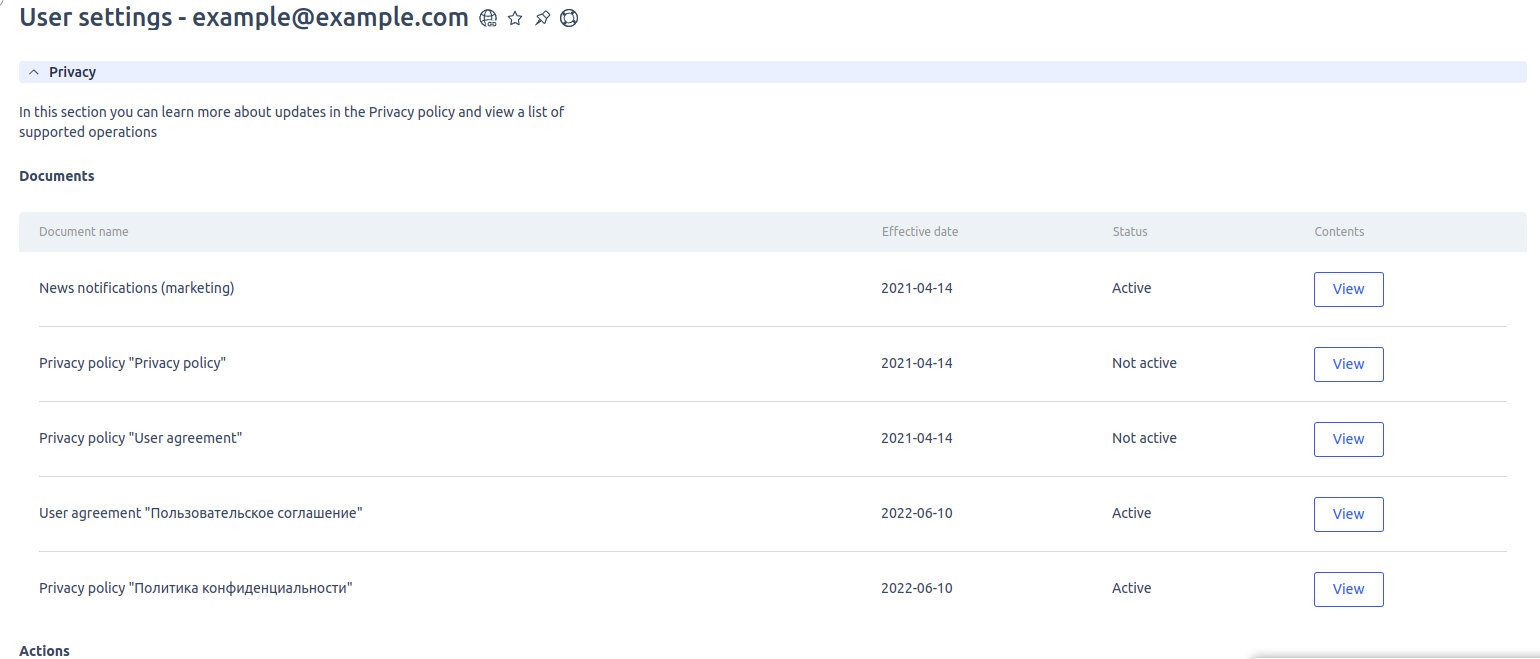
Privacy
Two-factor authentication
For your security, you can set up two-factor authentication in the corresponding section. To generate passwords, you must have Google Authenticator installed on your smartphone/tablet.
Press "Enable two-factor authentication".

Avatar
Under User settings you can upload a file for your profile avatar. Files of no more than 64 Kb and 80x80 pixels are supported.
 En
En
 Es
Es