 En
En
 Es
Es
IP pools group ranges of IP addresses. They can be designated as public and private IP addresses.
For operations with pools, enter Network → IP pools.
To create an IP pool:
- Press Create a pool.
- Enter a Pool name.
- Specify the IP range of the pool. You can enter a single IP address ("1.1.1.1"), a mask ("1.1.1.1/24") or a range ("1.1.1.1-1.1.1.5").
- Enable The pool is accessible on all locations option to allow DCImanager 6 to use IP addresses from this pool in all locations.
- To assign addresses from the pool to servers in specific racks, select Racks.
- Enter Notes, if needed. They will be displayed in the list of IP pools.
- To create a physical network that the range for the pool is allocated from:
- Enable the option Create a physical network.
- Enter a Network in the following format <network IP address>/<network mask prefix>. E.g. "172.0.0.0/24" or "2001:0db8:85a3:0001::/64".
You cannot create IPv6 newtork with prefix longer than /64. - Enter a Gateway.
- Enter Note, if needed.
- Click on Create.
The pool must not include the gateway and service addresses of the physical network.
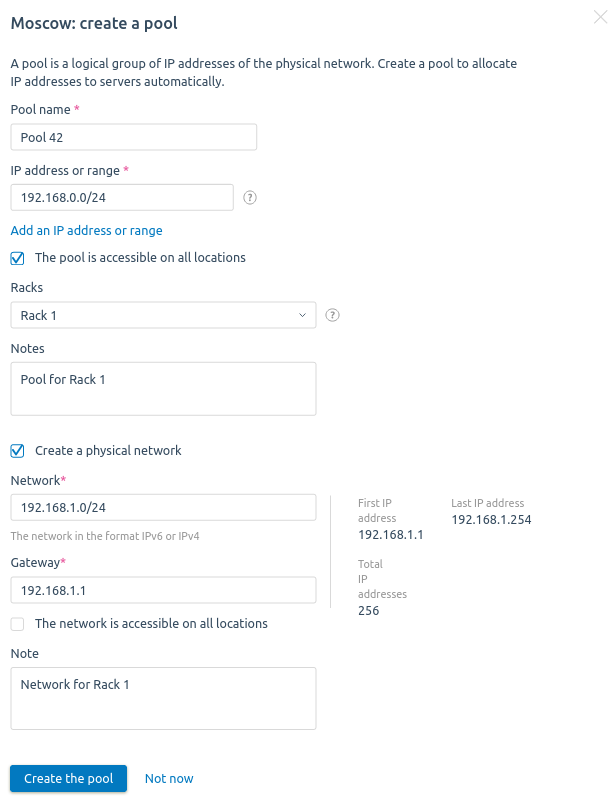
Example of pool creation
You can change the settings of the pool through the menu  in the line with its name.
To assign an IP address to a server from a certain pool when ordering and releasing that server:
- Press Pool general settings.
- Select the Pools for deallocation of servers.
- Select the Pools for allocation of servers. IP addresses from this pool will be assigned to servers in racks that are not assigned with any pool.
- Press Save.
Note
Only pools with IPv4 addresses can be used to release and provision servers.