To go to the client area settings, click on your email in the upper right corner and select the setting. For example, click Profile settings.
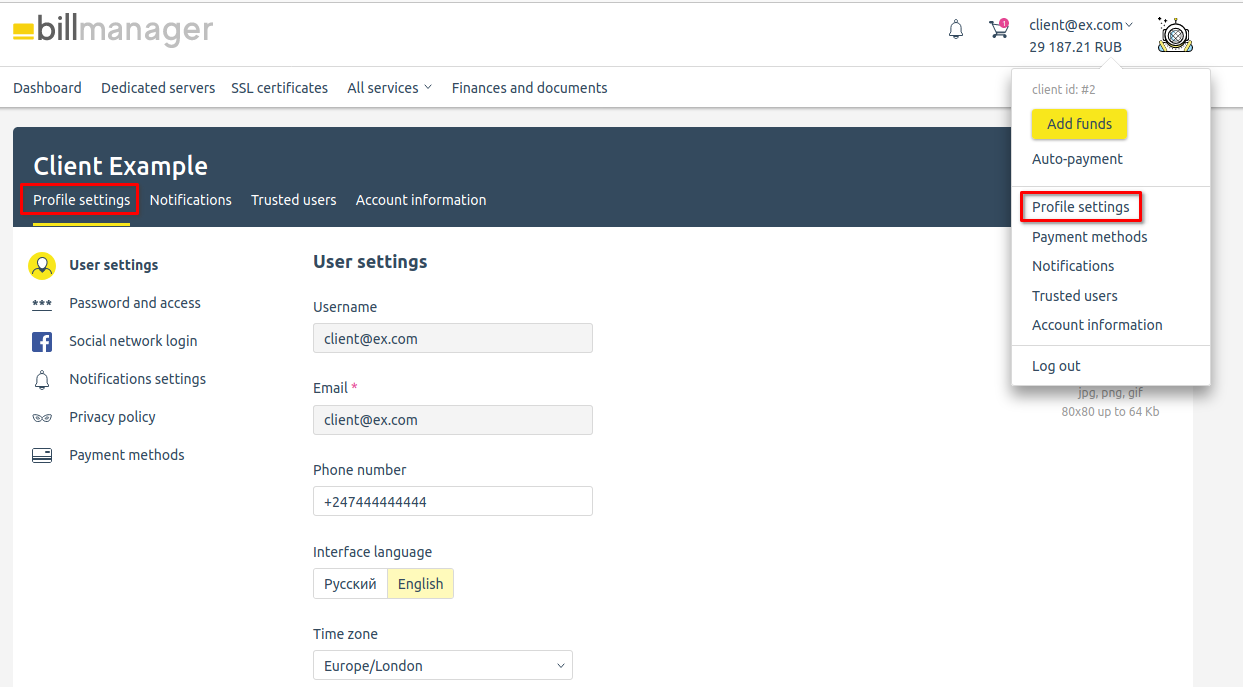
Profile settings
Profile settings
In Personal settings, you can change your phone number, upload your avatar and select your interface language. We recommend that you provide a current phone number so that employees can contact you quickly if necessary.
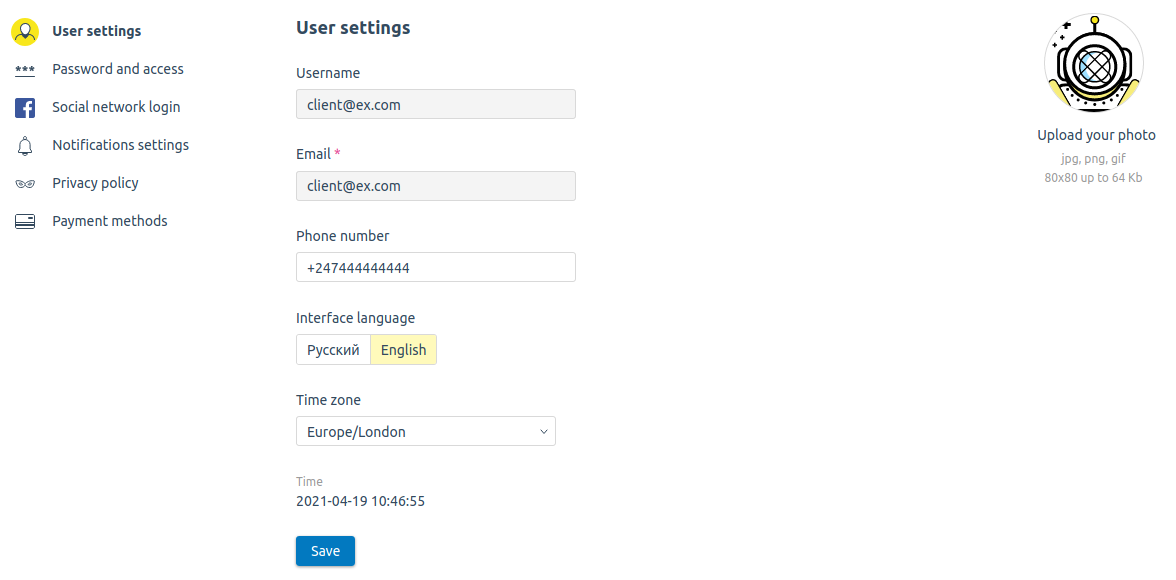
Personal settings
In the Password and access section, you can change your password, as well as set trusted IP addresses or their subnets, which allows you to limit access to your account.
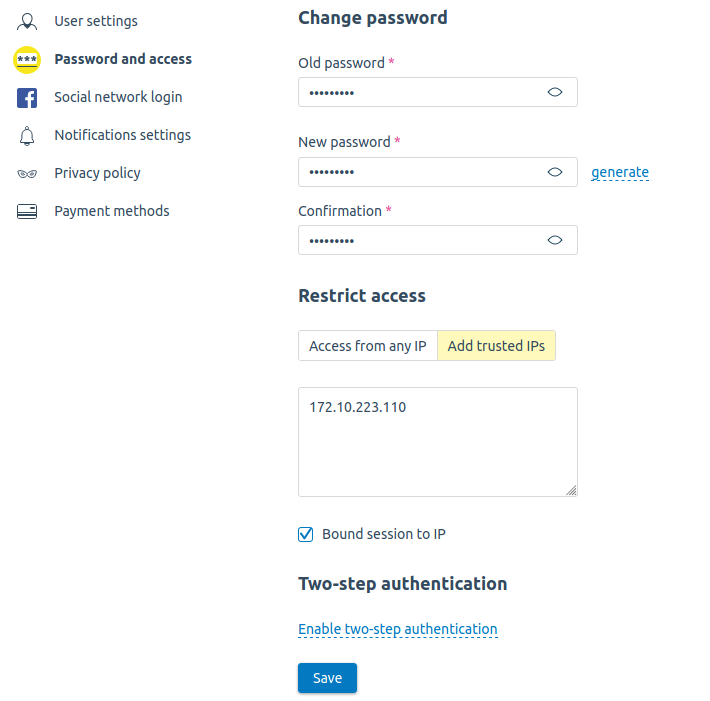
Password and access
You can log in to your client area using the Social network login: VK, Facebook, Google+. Select any social network, log in, and allow access for it. You can also disconnect the social network at any time.
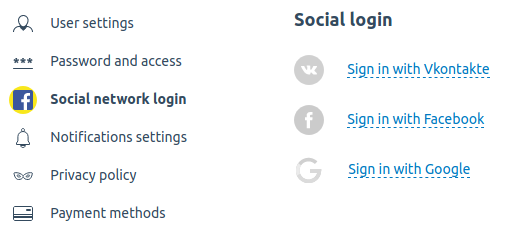
Login via social networks
In the Notifications settings section, you can select several channels and the desired types of notifications, depending on the settings of your provider:
- email;
- sms;
- messenger. In the current implementation, this is Telegram.
When you choosing notifications via the messenger, enter your Telegram username and write to the bot that your provider created. To find out the name of the bot, hover over the tooltip next to the Telegram field.
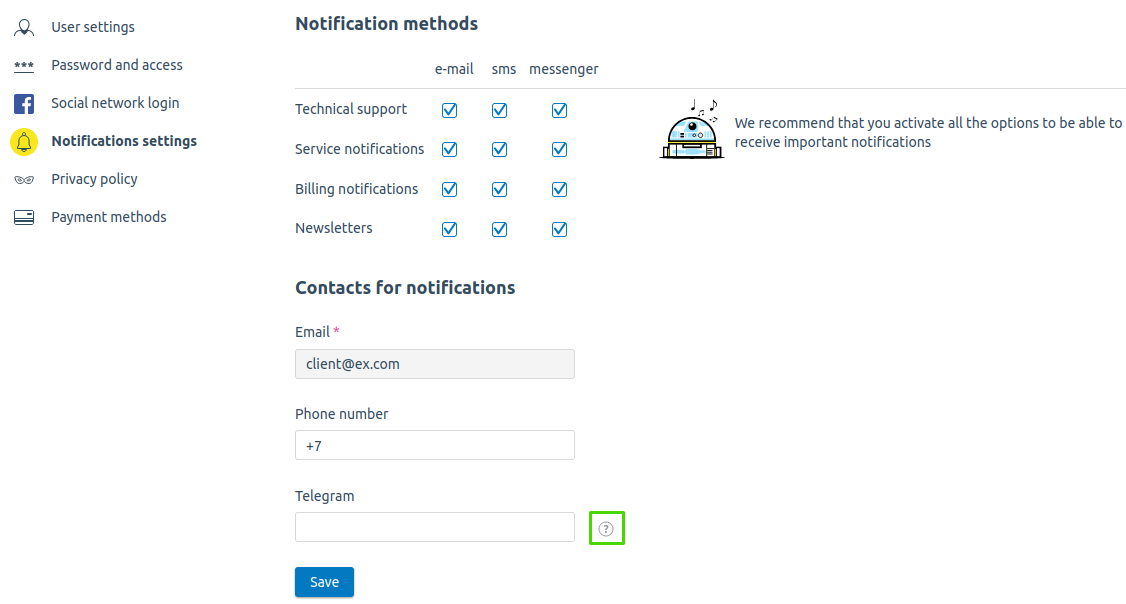
Notifications settings
Notifications will be sent to your email, phone or Telegram login: replies from technical support, messages about service statuses, accounting acts and invoices, as well as newsletters.
Under Privacy policy, you can review privacy policy updates, export your personal information, request deletion, or restrict the use of your personal information.

Privacy policy
Under Payment methods, you can save your bank card or e-wallet data for further automatic renewal of services with subscriptions. Read more in Payment methods.

Payment methods
Notifications
In your Client area, you can find all notifications that the billing system has sent to your email. You can read emails directly from the web interface. Notifications will be also available to all your trusted users, e.g. payers.
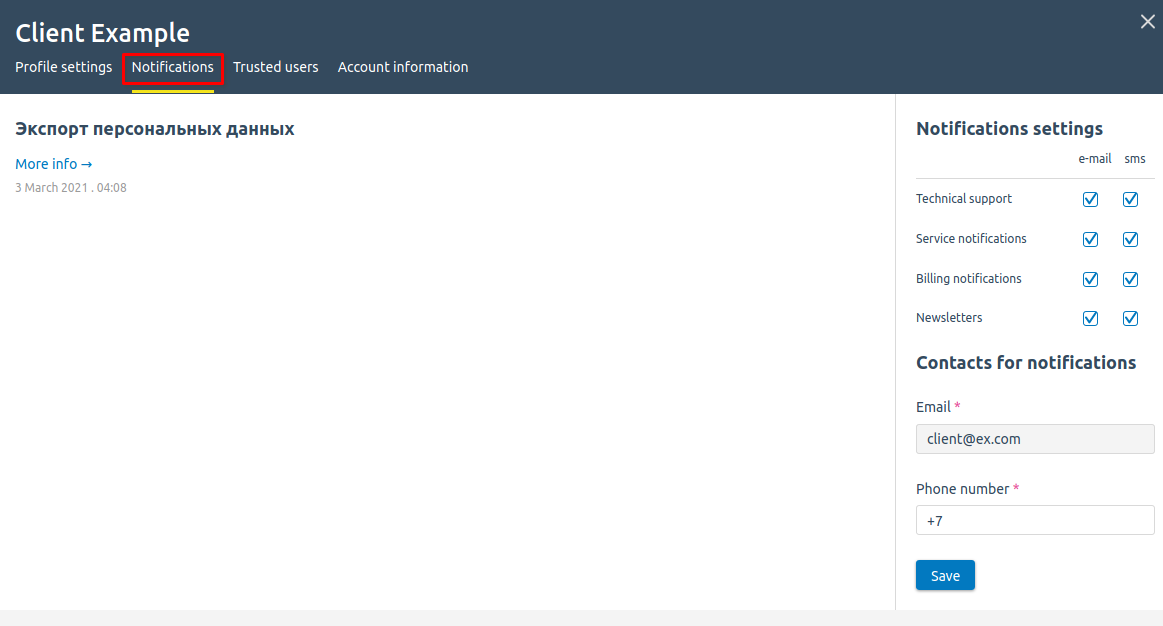
Notifications
Trusted users
Sometimes you need to grant access to your account area to other persons. E.g. your financial department needs access to overview invoices and documents, or your system administrator wants to manage your server and discuss equipment settings with the provider's support team. For this case, we have added Trusted users. Click on Add user in order to create a new account and specify the name, email, and password for this account. All notifications from your provider will be sent to this email address.

Trusted users
User permissions
You can manage the permissions of trusted users to access the client area functionality:
- Enter the Profile settings → Trusted users → select the user → Permissions.
- Select the permissions you want to Allow the user.
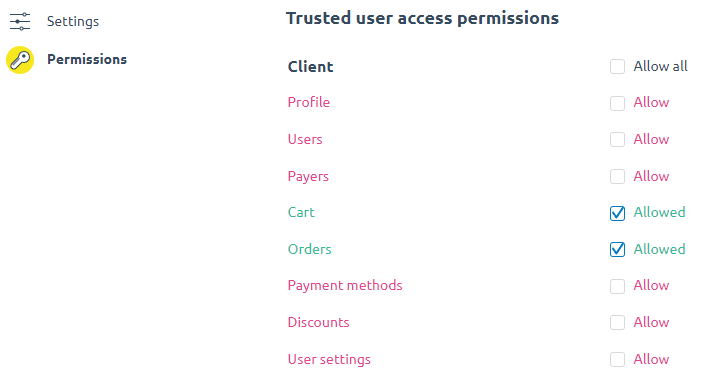
User permissions
Account information
Account information provides a brief overview of your profile. Client ID is the unique ID of your account (client). The service provider can use it to find a user in their system. E.g. you can tell your client ID when calling to the support team to facilitate identification of your account. On this page, you can check your current balance and Add funds to buy new services.
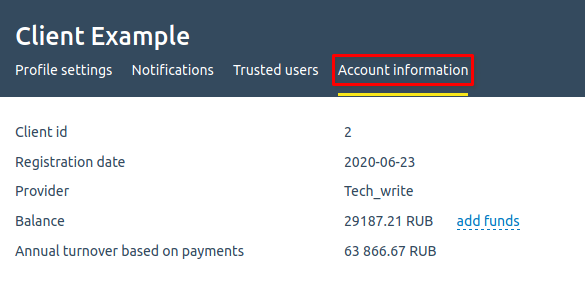
Account information
 En
En
 Es
Es