 En
En
 Es
Es
The article describes the installation of the BI module and the configuration of user permissions for accessing the module.
Server requirements
Hardware requirements
To install the module on the same server as BILLmanager, increase the server parameters by the amount of resources required for the stable operation of BILLmanager. For more information, see the article server requirements.
Software requirements
Use an unmodified operating system with a basic configuration: no third-party repositories and no additional services installed.
Supported operating systems:
- AlmaLinux 9 (installation guide);
- Ubuntu 20.04 (installation guide);
- Ubuntu 24.04 — version 6.120 and later (installation guide).
Network settings
When installing on a separate server, make sure that it accepts incoming SSH connections.
Install P ython 3: on the BI server:
apt install -y python3dnf install -y python3Allow on the server with BILLmanager:
- incoming connections to the DBMS (TCP/3306) from the server with the BI panel;
- outgoing requests to the server with the BI panel via HTTP/HTTPS.
Allow outgoing requests on the server with the BI panel:
- to the BILLmanager server to the DBMS (TCP/3306);
- to docker-registry.ispsystem.com via HTTP/HTTPS.
Installing the module
Order a free license for the module: log in to your client area → go to Products → Modules → click Order → select BI system module.
The module installation takes place in two stages:
Stage 1. Install the module:
- Go to Modules → select the BI system module → click Buy.
- Wait for the installation to complete. The system will open the BI initial setup window.
During the module installation, an employee account is automatically created for BI API requests to BILLmanager via HTTP.
Stage 2. Configure the module:
- Select the location option:
- On the same server as BILLmanager.
Specify the configuration settings:
- BI panel address — select any of the addresses specified in the BILLmanager settings (can be viewed in Settings → Panel addresses);
- BI panel port — specify the port on which the BI panel will be available .
- On a separate server.
Specify the parameters:
- BI panel address — specify the address of the BI panel server, it must not match the address of the BILLmanager server;
- SSH port — specify the port for connecting to the server with the BI panel;
-
Public SSH key, which must be placed on the external server in the key file. Specify /root/.ssh/authorized_keys. The key must be placed on the server before installing the BI panel on it. To do this, on the server where the BI panel will be installed, run :
echo 'ключ' >> ~/root/.ssh/authorized_keys
- On the same server as BILLmanager.
- Click Install .
The user account required for configuring the integration is created automatically during a new installation. - Wait for the installation result message:
- the installation was successful. Proceed to configure access permissions, see the section Configuring employee access to the BI system.
- the installation completed with an error. Open the installation log file to determine the cause. For more information, see the section Logging.
Configuring employee access to the BI system
To configure employee permissions, go to Integration → Modules → select the BI system module → click the icon  .
.
Two access levels are provided for accessing the BI: "Administrator" and "Employee". Select a user from the list and click:
- On or Off to enable or di sable the "Employee" access level;
- On admin. access or Off admin. access to enable or disable the "Administrator" access level.
Access status:
-
 — access with employee permissions is enabled;
 -
 — access disabled;
 -
 — access with administrator permissions is enabled.
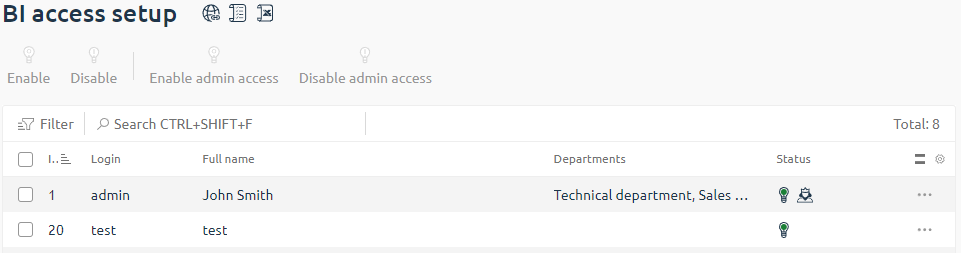
At the same time, a corresponding user is created in the BI panel. The list displays only users with enabled access.
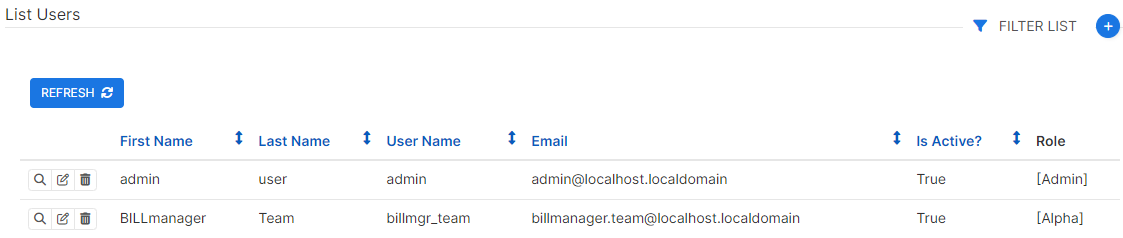
After receiving access permissions, the employee needs to refresh the page so that the Analytics section appears in the left menu of the platform web interface.
To log in to the BI panel in the Analytics section, click:
- Log in — for users with employee permissions;
- Log in as administrator — for users with administrator permissions.
You will be redirected to the BI panel, which will open in an adjacent browser tab.
The platform administrator in the left menu in the Analytics section has access to the following subsections:
- Access permissions — contains information about user access permissions on the server with the BI module;
- Update — contains information about available module updates. If an update is available, it allows you to install the current version.
Additional information
Main components:
-
/usr/local/mgr5/etc/business_intelligence/ansible/vars.json — the file contains parameters for deploying the BI. Main parameters:
- /usr/local/mgr5/etc/business_intelligence/ansible/run.sh — the BI system installer. It uses the parameters described in the vars.json file;
- /usr/local/mgr5/etc/billmgr.conf — the BILLmanager configuration file. Two parameters will be written to the BILLmanager configuration file after a successful installation of the BI system through the platform interface:
BIHost— the address of the server with the BI system;BIPassword— the administrator password on the server with the BI system.
The platform recognizes the BI module as installed only if the BIHost and BIPassword parameters are specified in the billmgr.conf configuration file.
BIHost and BIPassword are case-sensitive, their names must be entered exactly as specified, including the use of uppercase and lowercase letters.The parameters bi_app_host and
bi_app_password
in /usr/local/mgr5/etc/business_intelligence/ansible/vars.json match BIHost and BIPassword in /usr/local/mgr5/etc/billmgr.conf, respectively.
Connecting to the BILLmanager database
To access all tables of the BI module, configure the connection to the BILLmanager database:
- In the BI system interface, go to Settings → +Database button.
- Select the database to connect to (for example, MySQL) and specify the connection parameters:
- Host — the address of the BILLmanager DBMS server.
- Port — 3306.
- Database name — the name of the BILLmanager database.
- Username — the name of the user created during the BI module installation (default is
bi). - Password — the user password. It is located in the /usr/local/mgr5/etc/business_intelligence/ansible/vars.json file in the
bill_db_passwordparameter. For example:"bill_db_password" : "password". - Display name of the database.
- Additional parameters for connection.
- SSL — select the option if you need to use SSL encryption.
- Click Connect.
Connecting external analytics systems
To connect external analytics systems (for example, Power BI) to the BILLmanager database, use the credentials of the MySQL user created during the BI module installation.
If the connection is made from an external server, add the IP address of this server to the access permissions of the MySQL user:
mysql -u root -p
CREATE USER 'bi'@'connection_ip' IDENTIFIED BY 'password';
GRANT ALL PRIVILEGES ON billmgr.* TO 'bi'@'connection_ip';
FLUSH PRIVILEGES;
Where:
bi— the MySQL username;connection_ip— the IP address of the server from which the connection is made. For example,192.168.7.12;password— the MySQL user password.
Logging
- /usr/local/mgr5/var/bi_installer.log — BI installation log files.
BI logs are stored in docker containers:
- etl — the BI module component for transferring data from MySQL to the data-warehouse service (ClickHouse). The etl logs contain information about the connection to the BILLmanager database;
- bi-app — the interface with charts and dashboards. The logs contain requests to the Superset service.
To open the logs of the required container, run the command:
docker logs <name of the container>For more information, see the Docker documentation.
Migrating the BI system to another server
To migrate the BI system to a separate server:
-
On the server for the BI system:
-
Install Python 3:
Ubuntu 20.04, AstraLinux 1.7.4:apt install -y python3AlmaLinux 9:dnf install -y python3 - Place the public SSH key in the /root/.ssh/authorized_keys :
echo 'ключ' >> /root/.ssh/authorized_keys
-
- On the server with BILLmanager:
- In the /usr/local/mgr5/etc/business_intelligence/ansible/vars.json file, specify the data about the new server for the parameters:
bill_db_host;bill_db_name.
- Go to the /usr/local/mgr5 directory:
cd /usr/local/mgr5 -
Run the BI installation script from the /usr/local/mgr5 directory:
sbin/bi_installer --command install
- In the /usr/local/mgr5/etc/business_intelligence/ansible/vars.json file, specify the data about the new server for the parameters:
Related articles: