Keycloak is OAuth2 authorization software. Read more in the Keycloak documentation.
With the integration module you can set up authorization of your employees via Keycloak.
OAuth2 is an authorization protocol that allows one service to grant permissions to access a user's resources on another service. User processing and all checks are performed by the authorization server. The authorization server can be a third-party application, such as Google, Gosuslugi (ESIA), etc., or a server with Keycloak software installed.
Setup on the Keycloak side
Actions n the Keycloak side:
- configure the integration user (Client);
- create Client Roles for mapping to departments in BILLmanager;
- assign roles to employee (user) profiles.
To configure Keycloak for integration with BILLmanager:
- Log in to the system.
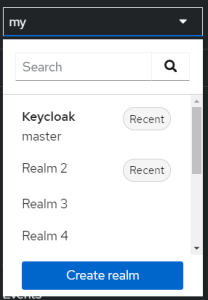
- Select the realm from the side menu.
To create a new realm, click Create realm.
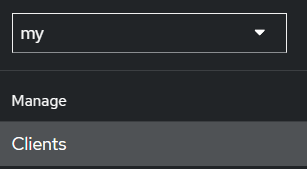
- In the side menu, enter Clients:
- Create a user for integration with BILLmanager. To do this, click Create client:
- on the General settings tab:
- Client type — select OpenID Connect.
- Client ID — specify the ID. This value will need to be specified in the BILLmanager settings as client ID.
- Click Next.
- on the Capability config tab:
- Client authentication — enable the option.
- Service accounts roles — enable the option.
- Click Next.
- on the Login settings tab:
- on the General settings tab:
- Go to edit the created integration user. Click on the Client ID in the table:
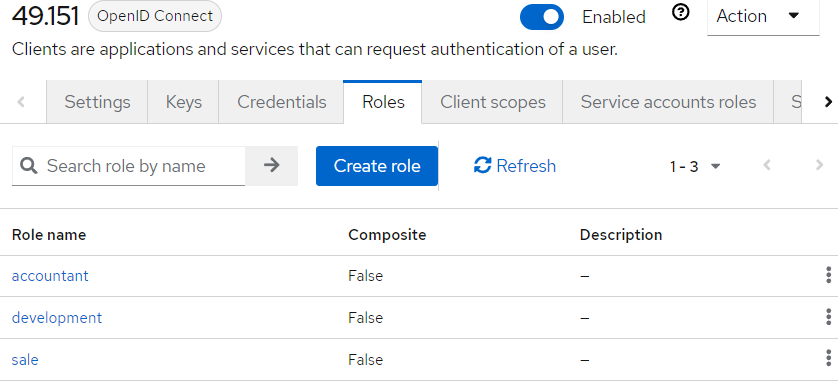
- Create roles for mapping to departments in BILLmanager: go to the Roles tab → click Create role.
Create as many roles as there are departments in your BILLmanager.
- Assign roles to the integration user (client) in the Keycloak system: go to Service accounts roles → click Assign role → set Filter by clients. Select:
- view-users;
- view-clients.
- Go to the Credentials tab → save the value in Client secret field.
- Create roles for mapping to departments in BILLmanager: go to the Roles tab → click Create role.
- Create a user for integration with BILLmanager. To do this, click Create client:
- In the side menu, go to the User section:
- Create user profiles Fill in the fields:
- Username;
- Email — if email was not specified in the profile on the Keycloak side, it will need to be specified when trying to authorize in BILLmanager.
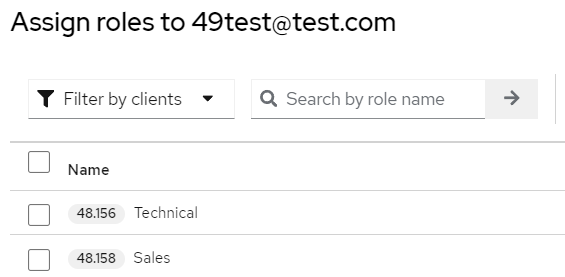
- Assign roles to employees:
- Create user profiles Fill in the fields:
Setup on the BILLmanager side
Installing the module
To install the module, enter Integration → Modules → Authorization via Keycloak → click Install.
Configuring the module
To open settings, enter Integration → Modules → Authorization via Keycloak → click  :
:
- Integration settings:
-
- Keycloak API URL — specify the address of REST API of the Keycloak system.
- Realm — specify the realm name in Keycloak.
- Client ID — specify the Client ID in Keycloak.
- Client UUID — specify the client UUID в Keycloak. You can get this data from the address bar when editing a client in Keycloak. The value is located between "clients/" and "/settings".
- Private key — specify the client secret in Keycloak. The required value can be found in Keycloak under Client → edit the client settings → Credentials tab.
- IP addresses list — specify a list of IP addresses from which you want to allow authorization via Keycloak.
You can specify individual addresses - 123.45.67.89, mask addresses - 123.45.67.0/24, or a range of addresses - 123.45.67.89-123.45.67.98.
For employees who have a Keycloak link, the addresses provided will also be used to restrict access to the platform. - Synchronization frequency — specify the frequency of running the cron job to synchronize users. The default value is 0 2 * * * * (every day at two o'clock in the morning). If you clear the field, the task will not be executed.
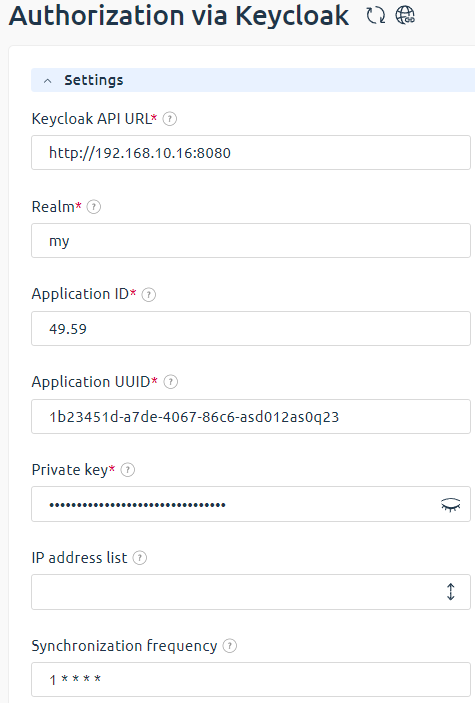
- Configure department and Client Role correspondence:
-
- Click Add.
- Department — select a department in BILLmanager.
- Client Role — select a role in Keycloak.
- Click Ок.
- Click Ок to save settings.
- To upload data to BILLmanager from Keycloack, click User synchronization.
Available actions with mapping settings:
- Edit — you can edit the Keycloack role to which a department is mapped in BILLmanager.
- Delete.
Enabling authorization
To enable authorization via Keycloak in BILLmanager, enter Provider → Providers → select a provider → click Edit → Registration and authorization methods → enable the option Keycloak.
After that, the Keycloak icon will be displayed on the authorization form in BILLmanager.
If allowed IP addresses are specified in the module settings, the Keyloack authorization icon will be displayed only when the page is opened from an allowed IP address.
How Keycloak works
Keycloak is only responsible for authorization in the system. User permissions and access management remain in BILLmanager. When editing user data in BILLmanager, the information is not uploaded to Keycloak.
Authorization of an employee in BILLmanager via Keycloak
Conditions:
- employee account (user) is created in Keycloak;
- employee account is mapped to a role in Keycloack (the role is set for user in Keycloack).
How it works:
- An employee opens the authorization page in BILLmanager.
- If allowed IP addresses are specified in the settings, BILLmanager checks the user's IP address. If the IP address is included in the list, a page opens with the option to authorize via Keycloack.
- An employee clicks the icon of authorization through Keycloak.
- The Keycloak authorization page opens, where the employee enters their Keycloak login and password.
- Keycloak verifies the employee's credentials.
- If the employee's credentials are entered correctly, Keycloak redirects the employee to BILLmanager.
- BILLmanager checks if an employee account is available:
- if the employee's account does not exist in BILLmanager, it will be uploaded from Keycloak. The employee is then redirected to BILLmanager.
- if the account exists in BILLmanager, the employee will be redirected to BILLmanager;
- If the employee's account exists in BILLmanager and in Keycloak, but the employee has not previously logged in via Keycloak, this authorization method will be saved. The employee is redirected to BILLmanager;
- if the employee's credentials are entered incorrectly, an error message will be displayed on the Keycloak or BILLmanager authorization page.
Uploading a new employee account to BILLmanager from Keycloak
Conditions:
- employee account (user) is created in Keycloak;
- employee account is mapped to a role in Keycloak (clientRoles is set for user).
How it works:
- BILLmanager requests a list of users from Keycloak. Data is uploaded when a synchronization task is started or when an attempt is made to authorize a Keycloak user who is not yet in the BILLmanager system.
- BILLmanager selects new users.
- BILLmanager creates new users with information from Keycloak. Access permissions are assigned according to the department specified in the mapping.
Uploading changes of employee accounts to BILLmanager from Keycloak
Changing an employee's account also counts as turning a user on and off in Keycloak.
Conditions:
- employee's user account was changed in Keycloak;
- employee account exists in BILLmanager;
- employee account was uploaded from Keycloak to BILLmanager.
How it works:
- BILLmanager requests a list of users from Keycloak.
- BILLmanager selects users with discrepancies.
- BILLmanager modifies user data with the information from Keycloak.
More details
Log files of interaction between BILLmanager and the Keycloak integration module are written to files:
- /usr/local/mgr5/var/omkeycloak.log — requests to Keycloak: obtaining an authorization token, generating links to go to Keycloak, requesting roles, requesting user information;
- /usr/local/mgr5/var/billmgr.log — error information.
 En
En
 Es
Es

